Exquisite Creations. Everyday Romanticism. Timeless elegance. The Embodiment of the Arts & Crafts.
Showing posts with label handsewing. Show all posts
14 May 2015
Educating Rita
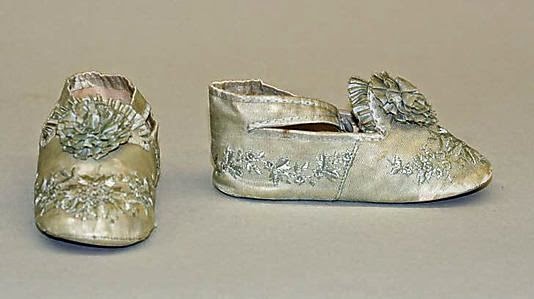
Recently, I was approached at a guild meeting in our area by someone wanting a Cinderella costume made for her granddaughter. She asked what our rate would be if she provided the fabric, and was told $100 (four hours' work at $20 an hour). She said thank you, she was collecting estimates, and moved on. The subtext, in her demeanour and tone was 'you charge too much. This is a kid's costume.' A similar gown was offered for sale by Ella Dynae Designs for $270 (see below).
I suspect that she was hoping for something in the range of $20 for the project, which would work out to $5 an hour. This may be the state minimum wage in Georgia, but in California it is $10 an hour and the median wage for a seamstress in the US is $11. Given our example, the costume would have cost $40-100 for labour, by a seamstress. I am at the high end of that scale because I am not a seamstress; I am a dressmaker, the median wage for which is $16 an hour.
So, what is the difference between the two?
A Seamstress is one who sews clothing from a pattern or alters clothing. Typically, they do not make their own patterns, work solely by machine, and do not do fine hand sewing. One would go to a seamstress for normal jobs, such as hemming, repairing zippers, making simple everyday clothing. Seamstresses formed the main labor force, outside tailoring, which fueled the expansion of clothing production and related trades from the seventeenth century onward. This expansion was not dependent initially on technological developments or the introduction of a factory system, but on the pool of women workers. Their expendability and cheapness to their employers was effectively guaranteed by the sheer number of available women able and willing to use a needle, their general lack of alternative employment, and by the fact they then worked outside the control of guilds and latterly have been under-unionized. These seamstresses sewed goods for the increasing market for ready-made basic clothes such as shirts, breeches, waistcoats, shifts, and petticoats for working people.
At the cheaper end of the trade, the work of seamstresses did not involve complex cutting, fitting, or designing, though there were no hard and fast rules. "Seamstress" has always been a flexible term, with the work involved dependent on local conditions and the agency of individuals. Some elaboration and finishing was involved, such as tucking or buttonholes. While work done in this style continued, seamstresses were generally distinguished from dressmakers, milliners, mantua-makers, stay-makers, embroiderers, and tailoresses by their lower levels of craft and skill, but at the top-end of the market fine sewing was valued. Their existence was precarious and exacerbated by layoffs due to seasonal demand and unpredictable changes of fashion. In the Victorian period, widespread demand for mourning clothes, short notice given for elaborate evening dresses, and fickle customers were commonly cited as causes of distress through overwork.
There were large numbers of seamstresses in a wide range of situations. They frequently worked as outworkers, on per-piece pay, in small workshops or in their homes. Having learned their trade in waged work, many seamstresses continued to use their skills after marriage by taking in work, often making simple garments or restyling old ones in their own poor communities where they played an important role in the provision of cheap clothing outside the regular retail trade. Some seamstresses were employed in a temporary but regular visiting capacity in wealthier households where they supplemented existing domestic staff and worked by arrangement through an accumulation of sewing and mending tasks, in exchange for a day rate of pay and meals. This practice lingered until World War II in some areas of Britain.
A Dressmaker, or couturiere, is one who makes patterns, designs garments, sews (often by hand), fits the design, scale and trim of the garment to the client, does embroidery, beading, makes trims, does hand finishing, and uses couture techniques. One would go to a dressmaker or tailor for expensive clothing of fine fabrics and trims for an event such as a wedding.
Historically, aristocratic and upper-class women's fashionable Western dress was created by an intimate negotiation between the client and her dressmaker. The investment in the design was principally in the cost of the luxurious textile itself, not in its fabrication. The origins of the haute couture system were laid by the late seventeenth century as France became the European center for richly produced and innovative luxury silk textiles. Thus the preeminent position of France's luxury textile industry served as basis and direct link to the development of its haute couture system. The prestigious social and economic value of an identifiable couturier, or designer's name, is a development of the late nineteenth and early twentieth centuries.
Beginning in the mid-nineteenth century, the Paris-based haute couture created a unique fashion system that validated the couturier, a fashion designer, as an artist and established his or her "name" as an international authority for the design of luxurious, original clothing. Couturiers were no longer merely skilled artisans, but creative artists with identifiable names printed or woven into a petersham waist tape that was sewn discreetly into the dress or bodice. This was the beginning of designer labels in fashion. The client was required to visit the couture house where a garment was made to measure to high-quality dressmaking and tailoring standards.
The couture house workrooms are carefully distributed according to sewing techniques. The sewing staff are divided between two areas: dressmaking (flou), for dresses and draped garments based upon feminine dressmaking techniques, or tailoring (tailleur), for suits and coats utilizing male tailoring techniques of construction. The staff work according to a hierarchy of skills ranging from the première, head dressmaker or tailor, to apprentices. The selling areas, salons, are equally controlled and run by the vendeuse, saleswoman, who sells the designs to clients and negotiates the fabrication and fittings with the workrooms.
In our example, the lady wanted a seamstress who would make a garment according to the pattern directions, for the size indicated, with no fittings or hand finishing. That's fine. However, when my own children were little, I made them costumes all the time, not just for Hallowe'en, and they wore them as playclothes for years, until they could no longer be let out, let down, and were threadbare; my point being that they lasted for years, as they were intended to do. To a child, a costume isn't just a one time wear item, it is the gateway into their magical world of imagination.
To my mind, this deserves the skills of the couturiere.
Labels:
cosplay,
costume,
couture,
handsewing,
heirloom,
historical dress
05 April 2015
Spring and Tokens of Affection
Since our move, we have all had the 'flu here at Brother Rabbit, so we apologise for the long delay in posting. But the apple and pear trees are now in bloom, and the lilacs have budded and are dotting the Hill with Easter colour.
Presently, we are working to have our Accessory items in museum shops across the United States, including Mount Vernon, Colonial Williamsburg, Monticello, as well as the Smithsonian and living history sites from Plimouth Plantation to the Dunsmuir Helman House.
We have a wide array of museum quality Gentlemen's, Ladies' and Children's items suitable for gifts, souveniers, and tokens of affection.
27 January 2015
Historical Sew Monthly 2015
After years of sighing wishfully, I have joined the Challenges. Lucky for me, they have been changed from Fortnightly to Monthly, so I have a hope of finishing.
My choices for the Challenges are thus far:
- January – Foundations: make something that is the foundation of a period outfit. (Finishing 1780s maternity stays)
- February – Colour Challenge Blue: Make an item that features blue, in any shade from azure to zaffre. (Arts & Crafts type print 1840s wrapper)
- March – Stashbusting: Make something using only fabric, patterns, trims & notions that you already have in stash. (Bust bodice(s)- the Reform answer to corsets, the necessary for S-bend corsets.)
- April – War & Peace: the extremes of conflict
and long periods of peacetime both influence what people wear. Make
something that shows the effects of war, or of extended peace. (Daughter of the Regiment Reform dress -1860s- in the manner of the 1st Virginia Cavalry.)
- May – Practicality: Fancy party frocks are all very well, but everyone, even princesses, sometimes needs a practical garment that you can DO things in. Create the jeans-and-T-Shirt-get-the-house-clean-and-garden-sorted outfit of your chosen period. (Gardening dress and smock, 1915, from the Sears Catalogue.)
- June – Out of Your Comfort Zone: Create a garment from a time period you haven’t done before, or that uses a new skill or technique that you’ve never tried before. (Steam punk frock from Simplicity 2172)
- July – Accessorize: The final touch of the right accessory creates the perfect period look. Bring an outfit together by creating an accessory to go with your historical wardrobe. (Embroidered stockings from Kannik's Korner)
- August – Heirlooms & Heritage: Re-create a garment one of your ancestors wore or would have worn, or use an heirloom sewing supply to create a new heirloom to pass down to the next generations. (My mother's Jackie Kennedy type wedding suit in ivory faille - bengalline)
- September – Colour Challenge Brown: it’s not the most exciting colour by modern standards, but brown has been one of the most common, and popular, colours throughout history. Make something brown. (English smock-frock?)
- October – Sewing Secrets: Hide something in your sewing, whether it is an almost invisible mend, a secret pocket, a false fastening or front, or a concealed message (such as a political or moral allegiance). (Pockets- early 18th C. Italian, embroidered)
- November – Silver Screen: Be inspired by period fashions as shown onscreen (film or TV), and recreate your favourite historical costume as a historically accurate period piece. (Lilliie Langtry's LBD, half-scale, full-scale for self in lilac with ecru lace - black is not my colour!)
- December – Re-Do: It’s the last challenge of the year, so let’s keep things simple by re-doing any of the previous 11 challenges. (Accessorize - embroidered mitts, 185s-60s caps.)
02 November 2014
Commission Frock Coat- 12th Doctor Who
We are in the midst of making a toile for a commissioned 12th Doctor Who coat, for next year's ComiCon.
I was very pleased to find the perfect matches for the wool and lining
This is the pattern I am using, from Laughing Moon, Number 109, with some variations per the customer:
The changes are to the shoulder seam (he wants a modern one, rather than the period slanted one) and to the back vent (narrowed). For us it is a chance to have some fun doing men's tailoring at a couture level.
More photos upcoming as we move along in the process.
Labels:
cosplay,
Dr. Who,
handsewing,
LARP,
re-enactor
24 August 2014
Compendium and classes!
For those of you who make your own items, you will be delighted as I was to find The Sharpe Compendium Shops - which lists shops that cater to the re-enactor, LARP, or cosplay communties. There are some familiar names among them, Wm. Booth, Draper, Nehelenia Patterns,
Smoke and Fire Company, Alter Years, Jas. Townsend and Son, Inc., The Staymaker ... It's a feast for the bluestocking in one!
For those of you who do not yet make your own items, but would wish to do so, we are offering courses in Historical Fine Hand-Sewing and Embroidery. The Handsewing Course is $150; the Embroidery Course is $300.
The Handsewing Course consists of Three PDF Lesson packages with materials (muslin, needles, thread) and instructions. The First Lesson consists of basic stitches (running, backstitch, whip, pin stitch) and seams (plain, felled, and whipped) and seam finishes, as well as historical commentary on the use of such methods
The Second Lesson involves the construction of pleats, ruffles, gauging and cartridge pleating, and tucks, as well as working with and finishing curved seams, French seams, and plain hemming. It concludes with historical commentary on the use of such methods, and study resources.
The Third Lesson progresses to fancy hems, faggoted seams, buttonholes of various sorts and the making of buttons. Period techniques such as simple needlelace, Dorset buttons, covered buttons and round buttons are included. Methods of attaching linings, piping and cording are an optional bonus.
Historical commentary on the use of such methods, and study resources accompany this final section.
Self tests are enclosed with the packets, and I am available to answer questions via email or the Workshops Page here.
At the end of the course, you can expect to have an artisan-level skill that, with practise, you can use for pleasure and profit.
By comparison, to get such a course from the Embroiderers' Guild, one would have to
* Be a Member - $60
* Pay for each Lesson - $150
* Purchase the materials - $20
The Embroidery Course consists of five PDF Lessons with materials (linen, hoop, needles, embroidery cotton, wool, beads and spangles) and instructions. The First Lesson consists of basic stitches (cross stitches, double running, algerian eye, Queen stitch, Irish stitch) as well as historical commentary on the use of such methods. It results in a working band sampler of the 17th Century mode for your future reference.
The Second Lesson progresses to surface stitches for both silk (or cotton) and wool (crewel). It includes advice on choosing colourways and methods of shading. It concludes with historical commentary on the use of such methods, and study resources. It results in a working spot sampler of the 17th Century mode for your future reference.
The Third Lesson encompasses whitework, including cutwork (reticella, broderie anglaise), drawn work, pulled work, Ayshire sprigging, casalguidi, and needlelace. It concludes with historical commentary on the use of such methods, and study resources. It results in working spot samplers of the 17th Century mode for your future reference.
The Fourth Lesson consists of quilting methods; flat quilting, patchwork, cording, trapunto, whole cloth and subdued crazy patch. Included is historical commentary on the use of such methods, and study resources. It results in quilt samples of the 18th and 19th Century modes for your future reference.
The Fifth Lesson has two options:
1) padded work ('stumpwork') and the use of gold, beads, and spangles. This was the piece de resistance of a young lady's 17th Century needlework education. Stitches used are surface embroidery, trapunto, needlelace, cutwork and pulled work. Historical commentary on the use of such methods and study resources are included. It results in a decorative piece which may be used in the traditional manner to cover a box lid, or framed.
2) painted surface embroidery picture. This was the pride of an early 19th Century young lady's needlework education. It consists of a memorial or sentimental scene, drawn with painted elements - such as the sky, with the details of the picture needle-painted with finely detailed and shaded surface stitching. Historical commentary on the use of such methods and study resources are included. It results in a decorative piece which may be framed and given as a gift, in the traditional manner.
Self tests are enclosed with the packets, and I am available to answer questions via email or the Workshops Page here.
At the end of the course, you can expect to have an artisan-level skill that, with practise, you can use for pleasure and profit.
By comparison, to get such a course from the Embroiderers' Guild, one would have to
* Be a Member - $60
* Pay for each Lesson - $250
* Purchase the materials - $100
Subscribe to:
Posts (Atom)